Hi my bloggie friends! I thought I would share a technique with you all:)
Part 1
Part 2

If you have any questions just give me a holler on my e-mail or leave a comment.
Hugs

Scrapbooking, Altered Art,and other Fun Stuff
Hi my bloggie friends! I thought I would share a technique with you all:)
Part 1
Part 2
If you have any questions just give me a holler on my e-mail or leave a comment.
Hugs


A few weeks ago I attended an all day crop. You would have thought I got a lot of stuff done, but it was not the case:( I kept on getting calls on my cell phone.. (Note to self: shut phone off at the next crop!) I did get 1 two page LO done and I did work on a few mini albums though. So here is a few pictures of the crop. The first one is of a 2 friends working away. Notice they are sharing a table…

Now, look at all my stuff, I took up a whole table myself and some!

and here is the LO I did manage to get done……

These pics are from when my girls were little. I am trying to get all their pictures scrapped before their graduation party. I would like to display their albums at their party. I hope I get them all done by July!
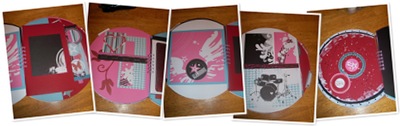
This album I made out of 2 vinyl records. I bound it with my bind it all. Boy o boy was that a trial and error process. The vinyl record kept on cracking when I went to put the binding holes in, but I did finally figure it out! You have to run the record under really hot water to soften the vinyl before you punch the holes. Anyway, this album is for my daughter to use for her senior year in high school. I have to make another one for my other daughter yet…I did leave some blank pages for my daughter to decorate herself.
I know I have been MIA:( but I have been working on a lot of stuff. I am finally getting around to posting all my little projects:)
So, I made this mini album for my Hubby for our Anniversary. He does not know that I have some of these old family pictures. What a surprise for him when I showed him the album!


I still have some journaling and embellishing to do, but the majority of the album is done!
So here is the first official page for the puppies album.Yes the dogs have their own albums…… I am not weird, they are also my children and deserve their own albums just like the human children. Anyway here it is.. Da Ta Da Da!!!!!

Happy Scrapping Everyone!
If you read my recent post on my word for 2010, then you know that my word is “Inspire” so here is my Inspire Creativity project.
This is the cupboard that I see while I am scrapbooking and crafting. So I thought I would spice it up with a little inspiration.

Sorry about the crocked picture taking skills I have, and the flash glare…
I cut the letters out of some vinyl with my cricut machine. Then I had all these paint chips laying around that I never use. I have been collecting them for awhile thinking that I will come up with a fabulous project to use them on ( It hasn’t happened yet). Aren’t the crayon paint chips just toooo cute!!!!! I just taped them up on my cupboard with scotch tape. Which means I can change it up really easy! Then I went on the web and found some texture images, printed them out, and stuck them up too. Now I have textures and colors to look at instead of white! I am sure though I will probably change all of it except the words often because I like change. You can ask my Hubby! He is quit sick of me rearranging the furniture because I make him move the heavy stuff. Anyway, I hope that this INSPIRES you to pick your word for 2010 and display it in a creative way. Next week I will post another display I am working on. Hope you all have an inspirational weekend:)
INSPIRE:
This word will be found throughout my home. I hope it will help me to remember to inspire someone everyday with creativity, faith, hope, determination, love, caring, and giving to others. I also want my children to do the same. If they see someone who is in need of help in any way, I want them to inspire that person and help them in any way they can. I think it is time for all of us as Americans to help those who need help, inspire those who need inspiration, give others faith and determination when they need a boost, offer hope and love to those who need it, and take time to care for someone who needs someone to care. I feel with the economy the way it is we all really need to help our neighbors through this tough time in any way you can. If we all took the time to care our world would be a better place!
So what will be your word to live by this year????
I challenge you all to find your inspirational word for 2010 and share it with others.
Make a scrapbook page that describes your inspirational word and what it means to you.
Find creative ways to display your word throughout your home.
You can link to this post, or just leave a comment with your blog address, and your word.
I will be posting what I have done throughout the month of January, so stop back:)
Your Inspired Friend,
Patti
Ok, so I had to play catch up with all the card challenges I missed while making Christmas gifts. So here are all the cards I have done so far and I only have a few more to go :)


This one is my favorite!!!


The last two are my attempt to think ahead for Valentine’s Day.
Now on to my new Puppy!
She is such a good puppy! We all just love her dearly including my 3yr. old weim. Remmi.


So this is a Ithaca update! Today she had no accidents in the house :) I think we are on the way to being housebroken!!! Hooray!!!
Happy New Year! Hope 2010 will be an awesome year for all of you!
I am finally done with the wall hangings for my parents and brother. They are as we speak in the mail off to their destinations. So I thought I would share with you what they look like. So Mom if you are reading this STOP! or you will ruin your Christmas gift…
So before I share the picture, I want to give the details. The pictures are old family pictures given to me by one of my Grandmothers and my mother. I have the only copies ( I am pretty sure, but not totally sure). So this is what I did. I first ripped up an vintage book that was lying around. I inked and distressed them all. Then I applied them to a piece of heavy cardstock with Modge Podge. When they dried I then dry brushed over the whole cardstock with vintage white paint. After that dried I inked it with distressing ink. I then took dimensional pearl paint and just went around the edges. I then distressed the edges and inked them with an ink pad. I will after the holidays do a step by step tutorial on the paper roses. the letters and swirls where cut with Storybook cartridge and the leaves where cut with Plantin School Book Cartridge. OK, so after my long rambling here is the final project……

Ok, now for the very special present I received from my daughter Shelby. When you see what it is you will know why I haven’t posted in a while. I will give you a hint….. It is furry and cute… Ooooppppps I think I gave it away :0 Ok, ok I will show you! But I have to warn you these pictures are full of total cuteness, and will just melt your heart.


I warned you! This is Ithaca's Royal Beauty or Ithy for short. She is a weimeraner puppy. I have a 3year old male named Remmington. I have been wanting to have a female for a long time to breed, and my daughter knew this. So she was looking all over to find me a female pup. I was totally surprised when she and my Hubby told me last Friday that we were going to pick this cutie up. When I saw her for the first time my heart just melted and I was instantly in love! She is doing really good with the house training, and she already knows the command sit! She is just a fantastic puppy:)!
Well that is it for my news for now…
I want to wish everyone a Joyous Christmas and my God bless you and your Family!
So you may be wondering what Miss Patti has been working on?? Or maybe not because you have your own Christmas gifts to work on. LOL! Well I have been making roses for a very special wall hanging for my Parents and Brother. You see, before my Grandma passed away she gave me some very old pictures of her and her parents. Well, I thought I would share them with my family. So I busted out the trusty ole scanner and scanned them for reproduction. Anyway, back to the roses. Here they are…..

This is the big one
and……

This is the rosebud. ( sorry about the dark picture, but I was having a hard time with getting a close-up of the bugger)
I will post the whole wall hanging when I am all finished. Right now it is in the drying process and then I have to put a title on it and few other minor details. I should be done by the end of the week so check back! :)
Well off to watch Polymark dry……..
I know I promised to post this last night, but my Hubby and I were called to the duty of helping a friend of ours move to their new house. So without further ado…

This is Polymark dimensional fabric paint that I found at Walmart for $1.14 a bottle. There are many different colors and it comes in pearl or glitter finish. This is white pearl iridescent and I have a gold pearl iridescent too! I can’t wait to go back to Walmart to get other colors and try the glitter ones. Now I found these in the craft section by the Tulip fabric paint.
So here is a few things a did with the Polymark.

This is the vintage paper that I made. I squirted the Polymark around the edge of the paper, then I took a paint brush and in circular motion spread it around the edges. It kinda made a dimensional and really cool look around the edges. When I am done with the page I am making I will post it. :)
So while I was swirling the Polymark around I thought that it would be cool for flower centers, and fake pearls or brads on cards and LO’s. ( I will try that next)
So then I was making paper roses for a LO and I wanted them to have a vintage look to them. I used my tattered rose distressing ink to vintage up my roses, then I dry brushed the Polymark on the edges. It really made the rose look vintage..

It almost looks like the old fashioned satin roses, Don’t ya think?? I am just lovin the Polymark! I am off now to see what else I can do with it!!:)
So I thought I would share with you a decorating project I have been working on. I saw this idea on the Magic Brush Inc. blog. You need to visit Jen at Magic Brush she has an awesome blog with lots of do it yourself projects. Anyway, this Christmas decorating project did not take very long at all. I did the 2 displays in one evening. What you need is some branches and some greenery and white and silver metallic spray paint. Easy Peasy!!!!
The first 2 pics are of the cornice above my big window in my kitchen.


This is one of the displays above my kitchen cupboards.

Hubby loved the idea because I didn’t spend a lot of money on Christmas decorations!! He was so impressed with the idea that he is in the process of making a wreath for my door out of my leftovers. I know that the pics don’t really give the displays any justice, but trust me it does look beautiful! Soooooo, go and try it for yourself! :)
Have a great week!
P.s. Later tonight I will be posting on a new fun product for cards and scrapbooking that I have discovered!!!

This is the LO I am making for family gifts. All I have to do is take a family picture. This may be tough with all our schedules, but I will manage.
Anyway here is how I made this:
I glued ripped pages in a random fashion from an old book I had on to cardstock. I then dry brushed while paint all over making sure some of the texted showed through. Then I embossed the corners with sparkly embossing powder. I then added some blue Shimmers to the rest. Using the Plantin School book cartridge I cut the leaf out with cranberry colored paper to make the poinsettia flower. 4- 4inches, 4- 3 1/2 inches, 4- 2 inches, and 4- 1 inch. I then cut 2 leaves with green cs @ 4 inches. I then inked the flower leaves with a warm red ink pad and tattered rose distressing ink. When the leaves dry get out some warm white craft paint and lightly paint the leaves being careful not to make it too dark and covering too much of the red. After drying time stickle the edges of the leaves. For the center of the poinsettia I just squeezed a blob of stickles. Now for the leaves of the poinsettia I inked them with a dark dreen ink pad and did the warm white paint. After everything is dry I then coated the flower leaves and the actual leaves with liquid glass. Now while the liquid glass is drying you are going to go back to your layout and distress the edges and the take tattered rose distressing ink to the edges and all over. A little bit here and a little bit there. Now with the Storybook cartridge cut the swirls with gold texture cardstock and sand them. Cut your title and stickle the letters. I used my sizzix machine to cut the tag and covered it with gold metallic rub. Now when all the leaves are dry start assembling the flower. For a more dimensional look fold the leaves slightly before gluing them together. For the leaves I slightly folded and crumpled the edges. Other items used are lace, ribbon, and a button. The lace is under the swirls and the poinsettia. Sorry you can’t see it, but I just couldn’t get a good picture the shows it. The button and ribbon I put on the journaling tag.
I would like to wish everyone and their families a a very Happy Thanksgiving with many blessings.
Now I would like to share a favorite family Thanksgiving recipe.
Pumpkin Crunch Cake
1 box of yellow cake mix
1 can (15oz) pumpkin
1 can (12oz) evaporated milk
3 eggs
1 1/2 C. sugar
1 tsp. cinnamon
1/2 tsp. salt
1/2 C. chopped pecans
1 C. butter ( or margarine)
1 container of whipped topping or ice cream
Grease bottom of a 9x 13 in. pan. combine pumpkin, evaporated milk, eggs, sugar, cinnamon, and salt in a large bowl. Pour into pan. Sprinkle dry cake mix evenly over pumpkin mixture. Top with pecans. Melt butter and drizzle over pecans. Bake for 50 – 55 minutes in a 350 degree oven. Cool. Serve chilled with whipped topping or ice cream.

Doesn’t it look yummy!!!!! This is a must make every Thanksgiving in my house…
Happy Thanksgiving!
Well, here it is! This is my think ahead LO. I had it done a few days ago, but had to wait for the stickles to dry. Then while the stickles were drying my darling son decided to put his school papers on it. Well, my LO was stuck to his school papers! Soooooo, I had to take a few things off and redo them. Anyway, I will add the year and journaling when I add the picture. So it is a little naked.

I took a white stamp pas from Close to My Heart and wiped it on the blue cardstock. I had a small snowflake stamp that a friend made me years ago that I used for the snowflakes. I also added stickles to the snowflakes. The Christmas trees I just cut free hand with my deckled edge scissors. I then put drops of stickles on the trees to look like ornaments. The star was cut with the cricut and Plantin Schoolbook cartridge. The frame for the picture was cut using Storybook cartridge. The word Christmas I stamped on the blue cardstock with the white stamp pad. I think the stamp was from Autumn Leaves. Then I cut it out and stickled it all up…
Now I am off to a new project :)
Hope you all have a Happy Thanksgiving!
Wow, have I had a busy 2 weeks! I have finally found time to do some creating:)
So this is a LO I did today of my youngest daughter. My oldest daughter took the picture for her photography class. So when she handed it to me last night I decided that the LO would be black and pink. My favorite color combo:)

So this is what I did:
Black cardstock with painted edges ( I used baby pink craft paint) The decorative edge paper is from Making Memories, pink floral is from Pressed Petals, pink striped paper I am not sure of…. I used the Storybook cartridge to cut the flowers. I layered cream cardstock and the pink pattern papers to make the flowers and inked the edges of each cut. All the rub-on’s are from American Crafts. The “BRE” is from American crafts also. I love these letters! They are velvet on chipboard. I am not sure where I acquired the chipboard butterfly or the pattern ribbon.
Anywho, I went digging around and found the buttons and ribbon. I didn’t even know that I had that ribbon. I really need to do some inventory on my scrap stuff. I kept saying when I was digging around “ Wow, I didn’t know I had that” I know some of you can relate to this. So I have decided to somehow figure out a inventory system. When I come up with something I will do a post on it. If anyone has suggestions I would love to hear it!!! :)
I am working on another LO for up and coming Christmas pics so when I am done with it I will post it. I am trying to think ahead when I should be working on all the stuff I am behind on:0
Well I guess I am done rambling on and on…..
See you on my next post :)
This card was for a sketch challenge on FCTSC forum. This was my second attempt at the challenge. I went way off the sketch for the first card I made, but I love that card too!

This is the first card I made! Do you notice the big difference????

Way off!!!

Here is a layout that I managed to finish today. I really don’t know how I managed to finish this with my crazy day! This is a LO of my two youngest waiting for the bus on the first day of school. I am not really impressed with it, but guess what…. They all can’t be impressive now can they:) I am happy with it, I guess….
Now the card……….

This is a very simple card that I made from the scraps of a mini album I am working on. I will send it to my friend one of these days:) I just love it when I use my scraps right away instead of throwing them in my scrap drawer :) It just makes me sooo happy!!!!
Ok…
Now for a sneak peek of my girls Senior pictures I picked up today. This is just one of each of the girls poses. The rest you will have to see later when I do a home decor project :) ok now the pictures….

This is Sydney-Elizabeth

and this is Shelby’s
Well I guess that is all for today.. I hope you have a productive week!